Forwarding events to mobile devices
You can configure Lenovo XClarity Administrator to push event notifications to mobile devices
Before you begin
Ensure that a valid DNS server is configured to allow Lenovo XClarity Administrator to connect to the Apple or Google push servers. This can be configured by clicking the and then clicking the Internet Settings tab (see Configuring network access).
Ensure that all required ports for event management are open on the network and firewalls. For information about port requirements, see Port availability.
About this task
When the Lenovo XClarity Mobile app is installed on a mobile device, you can enable each connected Lenovo XClarity Administrator instance to push event notifications to that mobile device. When push notifications are enabled for a specific instance, a subscription is created in Lenovo XClarity Administrator for that mobile device.
You can define the events that are pushed to the mobile device by assigning predefined or customized global event filters for each Lenovo XClarity Administrator instance. The predefined global event filters are enabled by default. Lenovo XClarity Administrator starts monitoring for incoming events based on the filter criteria. When a match is found, the event is forwarded to the mobile device.
For more information about Lenovo XClarity Mobile and supported mobile devices, see Using the Lenovo XClarity Mobile app.
Procedure
To set up push notifications to that mobile device, complete the following steps from the Lenovo XClarity Mobile app on your mobile device.
Results
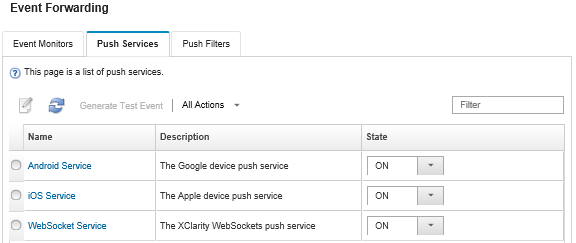
You can manage subscriptions from the Event Forwarding page in the Lenovo XClarity Administrator web interface. Click to display the Event Forwarding page.
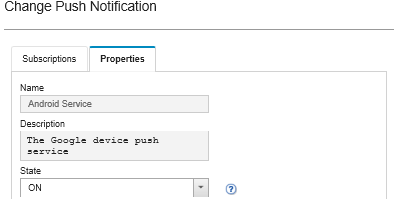
You can change the device notification service properties from the Push Service tab on the Event Forwarding page by clicking the link for the push notification service (Google or Apple) in the Name column to display the Change Push Notification dialog, and then click the Properties tab.
You can enable and disable subscriptions:
Enable or disable all subscriptions for a specific device notification service from the Push Service tab on the Event Forwarding page by selecting the ON or OFF state in the table for the device notification service.
Enable or disable all subscriptions for a specific device from the Lenovo XClarity Mobile app by tapping , and then enabling or disabling Enabled push notification.
Enable or disable a specific subscription from the Lenovo XClarity Mobile app by tapping , tapping a Lenovo XClarity Administrator connection, and enabling at least one event filter or disabling all event filters.
You can generate a test event for all subscriptions for a specific mobile service from the Push Service tab on the Event Forwarding page by selecting the mobile service and clicking Generate Test Event.
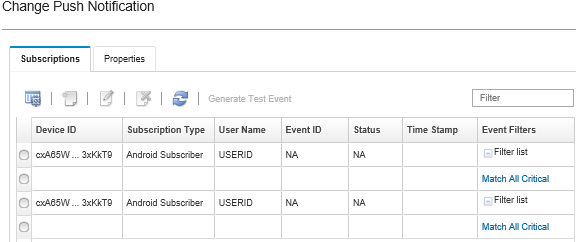
You can view a list of current subscriptions. From the Push Service tab on the Event Forwarding page, click the link for the applicable device notification service (Android or iOS) in the Name column to display the Change Push Notification dialog, and then click the Subscriptions tab. The device ID identifies each subscription.
TipThe device ID is the first and last 6 digits of the push registration ID. You can find the push registration ID from the Lenovo XClarity Mobile app by tapping .
- If you are logged in as a user with one of the following roles, all subscriptions are displayed; otherwise, subscriptions for only the logged-in user are displayed.
lxc-admin
lxc-supervisor
lxc-security-admin
lxc-sysmgr
You can view the list of event filters that are assigned to the subscription from the Subscriptions tab on the Change Push Notification dialog by expanding the Filter list in the Event Filters column for the subscription.
You can create event filters for a specific subscription from the Subscriptions tab on the Change Push Notification dialog by selecting the subscription, and click the Create icon (
 ).NoteThese event filters apply to only a specific subscription and cannot be used by other subscriptions.
You can also edit or remove an event filter by selecting the event filter and clicking the Edit icon (
 ) or Remove icon (
 ), respectively.
You can determine the status of the last attempted push for a specific subscription from the Subscriptions tab on the Change Push Notification dialog. The Time Stamp column indicates the date and time of the last push. The Status indicates whether the push notification was successfully delivered to the push service. No status is available regarding whether the push notification was successfully delivered to the device from the service. If the delivery to the push service failed, the Status column provides additional information about the failure.
You can generate a test event for a specific subscription from the Subscriptions tab on the Change Push Notification dialog by selecting the subscription and clicking Generate Test Event.
You can remove a subscription from the Subscriptions tab on the Change Push Notification dialog by selecting the subscription, and clicking the Remove icon (
).