Using remote control to manage Converged, Flex System, NeXtScale, and System x servers
From the Lenovo XClarity Administrator web interface, you can open a remote-control session to manage Converged, Flex System, NeXtScale, and System x servers as if you were at a local console.
Before you begin
- Remote control for these servers requires a Java Runtime Environment (JRE) with Java WebStart support installed on the client side. An open-source JDK is highly recommended. If you are using a vendor’s JRE or JDK, ensure that it is correctly licensed for commercial usage. The following JREs are supported.
Oracle JRE 7 (see Oracle Java download website)
AttentionJava 7 requires a minimum of TLSv1.2 support (see Configuring cryptography settings on the management server).
Support for Java 7 will be deprecated at a future date.
Oracle JRE 8, which requires a paid license (see Oracle Java download website)
Adoptium OpenJDK 8 with the IcedTea-Web v1.8 plugin (see the Adoptium OpenJDK website)
Amazon Corretto 8 (see Amazon Corretto 8 download website)
Java WebStart is not included in OpenJDK or Coretto installation packages and needs to be installed separately. IcedTea-Web or OpenWebStart can be used under the GNU GPLV2 license (see the IcedTea-OpenJDK download website and OpenWebStart website).
- You can launch a remote-control session on servers running the following operating systems (either 32-bit or 64-bit):
- Microsoft Windows 7
- Microsoft Windows 8
- Microsoft Windows 10
- Remote control requires that a Features on Demand key for remote presence is installed on Converged, NeXtScale, and System x servers. If the FoD key is not detected on a server, the remote-control session displays the Missing activation key message for that server when displaying the list of available servers. You can determine whether remote presence is enable, disabled, or not installed on a server from the Servers page (see Viewing the status of a managed server). For more information about FoD keys that are installed on your servers, see Viewing Features on Demand keys.
- The user account that is used to start the remote-control session must be a valid user account that has been defined in the XClarity Administrator authentication server. The user account must also have sufficient user authority to access and manage a server.
- Review the security, performance and keyboard considerations before opening a remote-control session. For more information about these considerations, see Remote control considerations.
- The Remote Control dialog uses the locale and display language settings that are defined for the operating system on your local system.
If your local system runs on Windows, see the Java website for information about how to change the locale setting. To change the display language, install a localized copy of Windows or install a language pack from the Windows website.
About this task
You can start multiple remote-control sessions from Lenovo XClarity Administrator. Each session can manage multiple servers.
To open a remote-control session to a server, the server must be in the Online or Normal state. If a server has any other access state, the remote-control session cannot connect to the server. For more information about viewing the server status, see Viewing the details of a managed server.
You can open an untargeted remote-control session by clicking from the Lenovo XClarity Administrator menu bar. Then, accept any security warnings from your web browser.
Procedure
Complete the following steps to open a remote-control session to a specific Converged, Flex System, NeXtScale, and System x server.
- Click the Remote Control icon (
 ).
).
Results
The Remote Control window is displayed.
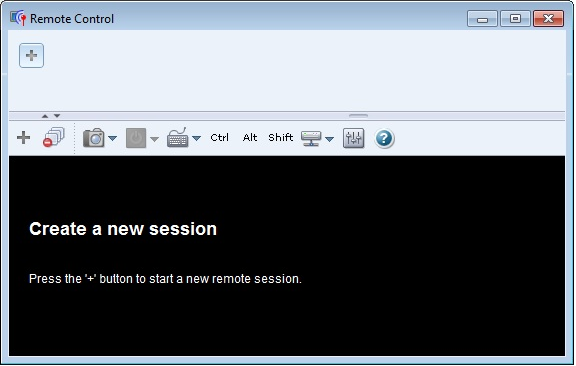
The thumbnail area displays thumbnails of all server sessions that are currently managed through the remote-control session.
You can display multiple server sessions and move between server sessions by clicking a thumbnail, which displays the server console in the video session area. If you are accessing more servers than fit in the thumbnail area, click the Scroll right icon (![]() ) and Scroll left icon (
) and Scroll left icon (![]() ) to scroll to additional server thumbnails. Click the All sessions icon (
) to scroll to additional server thumbnails. Click the All sessions icon (![]() ) to see a list of all open server sessions.
) to see a list of all open server sessions.
From the thumbnail area, click the Add server icon (![]() ) to add a new server to the list of servers that you are managing. For more information about adding a session, see Adding a server console to remote-control session. You can control whether the thumbnail area is displayed and how often the thumbnails are refreshed from the Thumbnail page. For more information about thumbnail settings, see Setting remote-control preferences.
) to add a new server to the list of servers that you are managing. For more information about adding a session, see Adding a server console to remote-control session. You can control whether the thumbnail area is displayed and how often the thumbnails are refreshed from the Thumbnail page. For more information about thumbnail settings, see Setting remote-control preferences.
After you finish
If the remote-control session does not open successfully, see Remote control issues.
- Add a session to other servers to the current remote-control session (see Adding a server console to remote-control session).
- Hide or show the thumbnail area by clicking the Toggle Thumbnails icon (
 ).
). - Display the remote-control session as a window or full screen by clicking the Screen icon (
 ) and then clicking Toggle on full screen or Toggle off full screen.
 - Use Ctrl, Alt, and Shift keys in a remote-control session (see Using Ctrl, Alt, and Shift keys).
- Define custom key sequences, known as softkeys (seeDefining softkeys).
- Take a screen capture of the currently selected server session, and save that screen capture in a variety of formats by clicking the Screen icon (), and then clicking Screenshot.
- Mount remote media (such as CD, DVD, or USB device, disk image, or CD (ISO) image) to the selected server, or move a mounted device to another server (see Mounting or moving remote media).
- Upload images to a server from remote media (see Uploading an image to the server).
- Power the server on or off from a remote console (see Powering on and off a server from a remote control session).
- Change remote-control preferences (see Setting remote-control preferences).