
Creating users

You can manually create user accounts in the local (embedded) authentication server. Local user accounts are used to log in to Lenovo XClarity Orchestrator and authorize access to resources.

About this task

Users in an external LDAP server are automatically cloned in the local authentication server with the name {username}@{domain} the first time the users log in. This cloned user account can be used only to authorize access to resources. Authentication still occurs through the LDAP authentication server for these users, and changes to the user account (other than description and roles) must be done through LDAP.

XClarity Orchestrator controls access to functions (actions) using roles. You can assign a different role to local and cloned users by adding those users to one or more user groups that are associated with the desired roles. By default, all users are members of the OperatorGroup user group (see Creating user groups).

At least one user must be a member of a local user group to which the predefined Supervisor role is assigned (see Controlling access to functions).

Attention
Before an external LDAP user can log in to XClarity Orchestrator, the user must be a direct member of an LDAP user group that is cloned in XClarity Orchestrator (see Creating user groups). XClarity Orchestrator does not recognizes users that are members of user groups that are nested in the cloned LDAP user group defined in the external LDAP server.

Procedure

To create a local user, complete the following steps.

  1. From the XClarity Orchestrator menu bar, click Administration (Administration icon) > Security, and then click Local Users in the left navigation to display the Local Users card.

    Local Users card
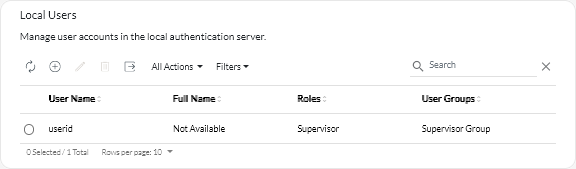
  2. Click the Create icon (Add icon) to create a user. The Create New User dialog is displayed.
  3. Fill in the following information in the dialog.
    • Enter a unique user name. You can specify up to 32 characters, including alphanumeric, period (.), dash (-), and underscore (_) characters.
      Note
      User names are not case sensitive.
    • Enter the new and confirm passwords. By default, passwords must contain 8256 characters and must meet the following criteria.
      Important
      It is recommended that you use strong passwords of 16 or more characters.
      • (1) Must contain at least one alphabetic character, and must not have more than two sequential characters, including sequences of alphabetic characters, digits, and QWERTY keyboard keys (for example, “abc”, “123”, and “asd” are not allowed)
      • (2) Must contain at least one number
      • (3) Must contain at least two of the following characters.
        • Uppercase alphabetic characters (A – Z)
        • Lowercase alphabetic characters (a – z)
        • Special characters ; @ _ ! ' $ & +

        White space characters are not allowed.

      • (4) Must not repeat or reverse the user name
      • (5) Must not contain more than two of the same characters consecutively (for example, “aaa”, “111”, and “...” are not allowed)
    • (Optional) Specify contact information for the user account, including the full name, email address, and phone number.
      Tip
      For the full name, you can specify up to 128 characters, including letters, numbers, spaces, periods, hyphens, apostrophes, and commas.
  4. Click the User Groups tab, and select the user groups to which this user is to be a member.
    Tip
    If a user group is not selected, the OperatorGroup is assigned by default (see Creating user groups).
  5. Click Create.

    The user account is added to the table.

After you finish

You can perform the following actions from the Local Users card.
  • View user properties by clicking the row in the table for a user to display the User Details dialog.
  • Modify the properties of a selected user, including the password and user groups, by clicking the Edit icon (Edit icon).
  • Delete a selected user by clicking the Delete icon (Delete icon).

    You cannot delete the existing LDAP user group from LDAP users

  • Export user details, such as user name, first name, and last name by clicking the Export icon (Export icon).