Updating XClarity Orchestrator
You can update Lenovo XClarity Orchestrator to use the latest orchestrator software.
Before you begin
You must be a member of a user group to which the predefined Supervisor role is assigned.
An XClarity Orchestrator fix bundle (such as v1.4.2) can be applied only to a version of the same release (such as v1.4.0 or v1.4.1) A fix bundle contains all previous fixes (for example, v1.4.2 contains the same fixes as v1.4.1 plus additional fixes); however, a fix bundle does not contain the entire code base.
- To XClarity Orchestrator v2.0
Updating to XClarity Orchestrator v2.0 requires XClarity Orchestrator v1.6. If you are not running XClarity Orchestrator v1.6, you must update to XClarity Orchestrator v1.6 before updating to XClarity Orchestrator v2.0.
The minimum storage required for the virtual appliance is a total of 551 GB across three attached disks. You must also attach a third disk (disk 2) with a minimum of 200 GB.
The XClarity Orchestrator virtual appliance must be powered off before adding a new hard disk.
To add a new hard disk to the virtual appliance, complete the following steps.
- For ESXi using VMware vSphere
- Connect to the host through VMware vSphere Client.
- Power off the XClarity Orchestrator virtual machine.
- Right-click the virtual machine, and click Edit Settings.
- Select .
- Change the size to 200 GB.
- Click OK.
- Power on the XClarity Orchestrator virtual machine.
- For ESXi using VMware vCenter
- Connect to the host through VMware vCenter.
- Power off the virtual machine.
- Open the virtual machine’s settings, and click Add.
- Click .
- Select SCSI for the disk format.
- Configure the HDD capacity to 200 GB.
- Click OK.
- Power on the virtual machine.
- For Microsoft Hyper-V
- From the Server Manager Dashboard, click Hyper-V.
- Right-click the server, and click Hyper-V Manager.
- Select the XClarity Orchestrator virtual machine, and click Shut Down in the Actions pane.
- Click Settings to display the Settings dialog.
- Select IDE Controller 1.
- From the right pane, select Hard Drive, and then click Add to add a new hard disk.
- From the right pane, select Virtual hard disk (.vhd) file, and then click New to display the New Virtual Hard Disk Wizard.
- Complete the wizard as prompted. Ensure that you specify a disk-drive name using .vhd format (for example, LXCO-disk3.vhd) and set the size to 200 GB.
- Select the XClarity Orchestrator virtual machine, and click Start in the Actions pane.
- For ESXi using VMware vSphere
- To XClarity Orchestrator v1.6. Updating to XClarity Orchestrator v1.6 requires XClarity Orchestrator v1.5. If you are not running XClarity Orchestrator v1.5, you must update to XClarity Orchestrator v1.5 before updating to XClarity Orchestrator v1.6.
- To XClarity Orchestrator v1.5. Updating to XClarity Orchestrator v1.5 requires XClarity Orchestrator v1.4. If you are not running XClarity Orchestrator v1.4, you must update to XClarity Orchestrator v1.4 before updating to XClarity Orchestrator v1.5.
- To XClarity Orchestrator v1.4. Updating to XClarity Orchestrator v1.4 requires XClarity Orchestrator v1.3. If you are not running XClarity Orchestrator v1.3, you must update to XClarity Orchestrator v1.3 before updating to XClarity Orchestrator v1.4.
- To XClarity Orchestrator v1.3
- Updating to XClarity Orchestrator v1.3 might take two hours or more to complete. To determine whether the update is complete, click , and verify that the new release is listed and that the Applied Status is no longer “Applying”.
- Attention: Before updating XClarity Orchestrator to v1.3, ensure that the XClarity Orchestrator virtual appliance hostname is lxco and no domain name set on the DNS Configuration card on the Administration (
 ) > Networking page.
 - Users that are assigned the Supervisor role are added to the SupervisorGroup user group during the update (see Creating user groups).
- Users that are assigned the Operator role are added to the OperatorLegacyGroup user group during the update. The OperatorLegacyGroup user group is associated with the Operator Legacy role, which gives users the same privileges as the Operator role in the previous releases. The Operator Legacy role and OperatorLegacyGroup user group will be deprecated in a future release (see Creating user groups).
Existing user groups are assigned to the Operator role during the update (see Controlling access to functions).
- Creating rules for raising custom analytics alerts is simplified in XClarity Orchestrator v1.3. Existing custom alert rules are not migrated to the new format and will be lost after the update completes.
- From XClarity Orchestrator v1.1
- Users that are assigned the Supervisor role are added to the SupervisorGroup user group during the update (see Creating user groups).
- Users that are assigned the Operator role are added to the OperatorLegacyGroup user group during the update. The OperatorLegacyGroup user group is associated with the Operator Legacy role, which gives users the same privileges as the Operator role in the previous releases. The Operator Legacy role and OperatorLegacyGroup user group will be deprecated in a future release (see Creating user groups).
Existing user groups are assigned to the Operator role during the update (see Controlling access to functions).
- Creating rules for raising custom analytics alerts is simplified in XClarity Orchestrator v1.3. Existing custom alert rules are not migrated to the new format and will be lost after the update completes.
- The minimum storage required for the virtual appliance is a total of 301 GB across two attached disks. You must increase the storage for the disk 0 to a minimum of 251 GB. You must also attach a second disk (disk 1) with a minimum of 100 GB.
The XClarity Orchestrator virtual appliance must be powered off before adding a new hard disk.
To add a new hard disk to the virtual appliance, complete the following steps.
- For ESXi using VMware vSphere
- Connect to the host through VMware vSphere Client.
- Power off the XClarity Orchestrator virtual machine.
- Right-click the virtual machine, and click Edit Settings.
- Select .
- Change the size to 100 GB.
- Click OK.
- Power on the XClarity Orchestrator virtual machine.
- For ESXi using VMware vCenter
- Connect to the host through VMware vCenter.
- Power off the virtual machine.
- Open the virtual machine’s settings, and click Add.
- Click .
- Select SCSI for the disk format.
- Configure the HDD capacity to 100 GB.
- Click OK.
- Power on the virtual machine.
- For Microsoft Hyper-V
- From the Server Manager Dashboard, click Hyper-V.
- Right-click the server, and click Hyper-V Manager.
- Select the XClarity Orchestrator virtual machine, and click Shut Down in the Actions pane.
- Click Settings to display the Settings dialog.
- Select IDE Controller 0.
- From the right pane, select Hard Drive, and then click Add to add a new hard disk.
- From the right pane, select Virtual hard disk (.vhd) file, and then click New to display the New Virtual Hard Disk Wizard.
- Complete the wizard as prompted. Ensure that you specify a disk-drive name using .vhd format (for example, LXCO-disk2.vhd) and set the size to 100 GB.
- Select the XClarity Orchestrator virtual machine, and click Start in the Actions pane.
- For ESXi using VMware vSphere
- To XClarity Orchestrator v1.1
- All users are automatically added to the SupervisorGroup user group. All users have supervisor privileges by default after the update completes. A supervisor user can remove supervisor privileges for other users that should not have those privileges (see Creating user groups.
- Existing external LDAP configurations are removed. You must reconfigure external LDAP authentication servers after the update completes (see Setting up an external LDAP authentication server).
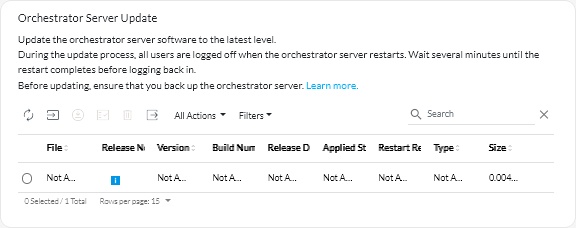
During the update process, all users are logged off when the orchestrator server restarts. You must wait several minutes until the restart completes. After the update completes and restarts, clear the web browser cache and refresh the web browser before logging back in.
Ensure that you back up the XClarity Orchestrator virtual appliance before installing an update (see Backing up and restoring orchestrator-server data).
Ensure that all required ports and Internet addresses are available before you attempt to update XClarity Orchestrator. For more information Port availability – XClarity Orchestrator and Firewalls and proxy servers – XClarity Orchestrator.
Procedure
To update XClarity Orchestrator, complete the following steps.
- From the XClarity Orchestrator main menu, click Maintenance (
 ), and then click Orchestrator Server Updates to display the Orchestrator Server Updates card.
 Orchestrator-server updates that are earlier than the currently installed version are listed in the table with an applied status of “Not applicable” and cannot be applied to the orchestrator server.
- Click the Import icon (
 ) to display the Import dialog.
 - Click Import. Orchestrator Server UpdatesImporting the update files might take a while. You must remain on the
card until the import process completes. Navigating away from the card aborts the import process. When the import is complete, the orchestrator-server update is listed in the table on the Orchestrator Server Files card.
You can monitor the import progress by clicking Monitoring (
 ) > Jobs from the XClarity Orchestrator menu bar.
 - Click the Apply Update icon (
 ).
).You can monitor the update progress by clicking Monitoring (
) > Jobs from the XClarity Orchestrator menu bar.
After you finish
You can perform the following actions from the Orchestrator Server Files card.
- View the current version and build number for the XClarity Orchestrator instance by clicking the User-Account menu (
 ) on the XClarity Orchestrator title bar, and then clicking About.
 - View the update history for a specific update that is applied to XClarity Orchestrator by clicking the update-status link in the Applied Status column.
- Save a selected orchestrator-server update to the local system by clicking the Save As icon (
 ).
). - Delete a selected orchestrator-server update by clicking the Delete icon (
 ).
).