Creating data-forwarding filters
You can define common data-forwarding filters that can be used by multiple forwarders to trigger forwarding data that match specific criteria.
About this task
You can create the following types of filters.
- Events filters forward events that match specific event codes or properties (such as event classes, event severities, and service types)
- All codes and properties apply to all event sources.
- If no class properties are selected, all class properties are matched.
- If no serviceable properties are selected, all serviceable properties are matched.
- If no severity properties are selected, all severity properties are matched.
- If no event code is specified, all event codes are matched.
- Resource filters forward data that is generated by specific resources (XClarity Orchestrator, resource managers, and devices). You can choose a subset of resources by selecting one or more resource groups.
- If a resource type is disabled, no data from that resource type is forwarded.
- If a resource type is enabled, and no groups are selected, all data from that resource type is forwarded.
- If a resource type is enabled, and one or more groups are selected, only data that is generated by the resources in selected groups are forwarded.
You can reuse event and resource filters in multiple forwarders; however, you can add at most one event filter and one resource filter to each forwarder.
Procedure
To create a data-forwarding filter, complete one of the following steps depending on the type of filter that you want to create.
- Event filters
- From the XClarity Orchestrator menu bar, click Monitoring (
 ) > Forwarding, and then click Data Forwarder Filters in the left navigation to display the Data Forwarder Filters card.
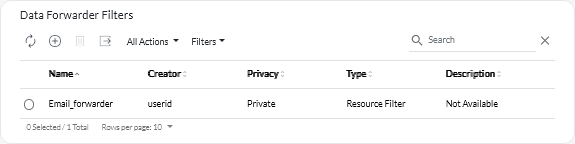
- Click the Create icon (
 ) to display the Create Data Forwarder Filter dialog.
- Specify the filter name and optional description.
- Select Event filter as the filter type.
- Select the privacy type.
- Private. Only the user that created the filter can use the filter.
- Public. Any user can use the filter.
- Choose event properties or event codes as criteria for this filter.
- Click Rules, and select the criteria for this filter based on the criteria type that you selected in the previous step.
- Match events by properties. Select one or more severity, serviceability, and class properties. Only events that match the selected properties are forwarded.
For example, if you choose warning and critical severities, and adapter and memory classes, then event data is forwarded for only warning memory events, critical memory events, warning adapter events, and critical adapter events, regardless of the serviceability of the event. If you select only user serviceability, then event data is forwarded for only events that are user serviceable, regardless of the severity or class.
Note- If you do not select a class property, all class properties are matched.
- If you do not select a serviceable property, all serviceable properties are matched
- If you do not select a severity property, all severity properties are matched.
- Match events by code. Enter an event code that you want to filter, and then click the Add icon () to add the event code to the list. Repeat for each event code that you want to add. You can delete an event code by clicking the Delete icon (
 ) next to the specific code.
Only events that match one of the listed event codes are forwarded.
You can specify a full or partial event code. For example, FQXXOCO0001I matches the specific event, FQXXOSE matches all XClarity Orchestrator security events, and CO001 matches all events that contain those characters.
If you do not specify an event code, all event codes are matched.
To find a list of available event codes, see Event and alert messages.
- Match events by properties. Select one or more severity, serviceability, and class properties. Only events that match the selected properties are forwarded.
- Click Create to create the filter.
The filter is added to the table.
- From the XClarity Orchestrator menu bar, click Monitoring (
- Resource filters
- From the XClarity Orchestrator menu bar, click Monitoring () > Forwarding, and then click Data Forwarder Filters in the left navigation to display the Data Forwarder Filters card.
- Click the Create icon () to display the Create Data Forwarder Filter dialog.
- Specify the filter name and optional description.
- Select Resource filter as the filter type.
- Select the privacy type.
- Private. Only the user that created the filter can use the filter.
- Public. Any user can use the filter.
- Click Resources, and select the source of events for this filter.
- Match any XClarity Orchestrator events. Forwards events that are generated by this XClarity Orchestrator. This option is disabled by default.
- Match any resource manager events. Forwards events that are generated by a resource manager. This option is disabled by default.
- If you disable this option, events are not forwarded from any resource managers.
- If you enable this option but do not select any manager groups, events that are generated by all resource managers are forwarded.
- If you enable this option and select one or more manager groups, events that are generated by only resource managers in the selected groups are forwarded.
TipYou can create manager groups from this card by clicking theCreate icon ( ). - Match any device events. Forwards events that are generated by a device. This option is enabled by default.
- If you disable this option, events are not forwarded from any devices.
- If you enable this option but do not select any device groups, events that are generated by all devices are forwarded.
- If you enable this option and select one or more device groups, events that are generated by only devices in the selected groups are forwarded.
TipYou can create device groups from this card by clicking theCreate icon ( ).
- Click Create to create the filter.
The filter is added to the table.
- From the XClarity Orchestrator menu bar, click Monitoring (
After you finish
You can perform the following action from the Data Forwarder Filters card.
- Remove a selected filter by clicking the Delete icon ().
You cannot delete a filter that is assigned to a forwarder.