Deploying VMware ESXi to SAN storage
Use this procedure as an example flow to illustrate the process for deploying the ESXi operating system to SAN storage that is connected to a server.
Before you begin
Before you begin this procedure, ensure that Lenovo XClarity Administrator is managing the chassis in which the Flex System x220 Compute Node is installed.
Procedure
Complete the following steps to deploy the ESXi operating system to an Flex System x222 Compute Node.
- Ensure that the image to be deployed is already loaded into the OS images repository by clicking .

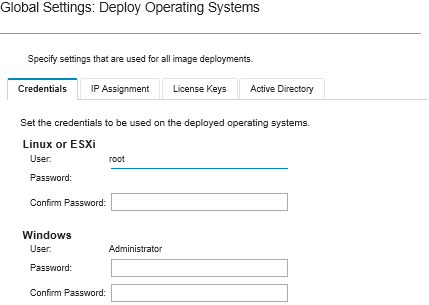
- Set global settings that are to be used as a default for all image deployments by clicking to display the Global Settings: Deploy Operating Systems dialog.
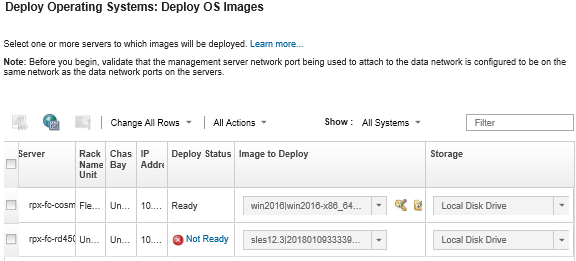
- Ensure that the server is ready for operating-system deployment by selecting server to which the operating system is to be deployed. Initially, the deployment status might be shown as Not Ready. The deployment status must be Ready before you can deploy an operating system to a server.TipYou can choose multiple servers from multiple Flex System chassis if you intend to deploy the same operating system to all servers. You can choose up to 28 servers.
- In that same column, click the License Key icon (
 ) to enter the license key for this deployment. Global Settings: Deploy Operating SystemsYou can also choose to use a mass-activation key that you entered in the
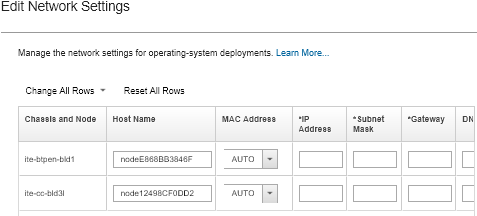
dialog. - Click Edit in the Network Settings column of the server row to configure the network settings that is to be used for this deployment. The Edit Network Settings page is displayed.Fill in the following fields:
- Hostname
- MAC address of the port on the host where the operating system will be installed
- Domain name system (DNS) serveres, if required
- Maximum transmission unit (MTU) speed
Global Settings: Deploy Operating SystemsIf you choseAssign static IP address (IPv4) from the dialog (step 4), also enter the following information: - IPv4 address
- Subnet mask
- Gateway
- From the confirmation page, click Deploy to deploy the image.
If the server currently has an operating system installed, you are warned about the fact that deploying the image will overwrite the current operating system.
TipYou can set up a remote-control session to watch the installation as it progresses. Clickto start a remote-control session with the server. When you deploy the operating system, Lenovo XClarity Administrator starts a job to track the deployment. To view the status of the deployment job, click from the Lenovo XClarity Administrator menu bar. Then, click the Running tab.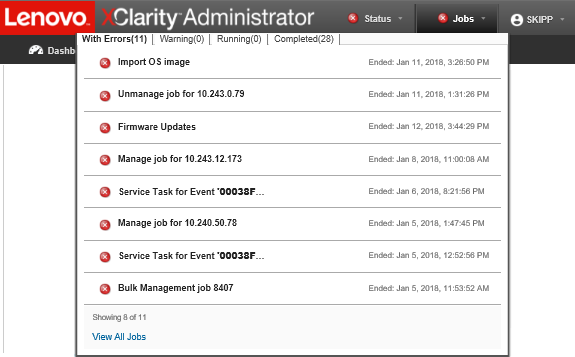
Hover over the running job to see the details, such as the percentage of the job that is complete.
Results
After the operating-system deployment has completed, log in to the IP address that you specified on the Edit Network Settings page to continue with the configuration process.
Note
The license provided with the image is a 60-day free trial. You are responsible for meeting all VMware licensing requirements.
Give feedback