You can configure Lenovo XClarity Administrator to forward specific events to an email service using SMTP.
Before you begin
To forward email to a web-based email service (such as Gmail, Hotmail, or Yahoo), your SMTP server must support forwarding web mail.
Before setting up an event forwarder to a Gmail web service, review information in Setting up event forwarding to a Gmail SMTP service.
About this task
You can create and enable up to 20 event forwarders to send events to specific recipients.
If XClarity Administrator is rebooted after event forwarders are configured, you must wait for the management server to regenerate internal data before events are forwarded correctly.
For XClarity Administrator v1.2.0 and later, Switches is included on the Events tab in the New Event Forwarder and Change Event Forwarder dialogs. If you upgraded to 1.2.0 or later from an earlier release, remember to update your event forwarders to include or exclude RackSwitch events as appropriate. This is necessary even if you selected the All Systems checkbox to select all devices.
Procedure
Complete the following steps to create an event forwarder for email using SMTP.
- From the XClarity Administrator menu bar, click . The Event Forwarding page is displayed.
- Click the Event Forwarder tab.
- Click the Create icon (
 ). The General tab of New Event Forwarder dialog is displayed.
 - Select Email as the event-forwarder type, and fill in the protocol-specific information:
Enter the name, destination host, and optional description for the event forwarder.
Enter the port to use for forwarding events. The default is 25.
- Enter the time-out period (in seconds) for the request. Default is 30 seconds.
Enter the email address for each recipient. Separate multiple email addresses by using a comma.
To send the email to the support contact that is assigned for the device, select Use Support Contact Email(s) (see Defining the support contacts for specific devices).
Optional: Enter the email address for the sender of the email (for example, john@company.com).
If you do not specify an email address, the sender address is LXCA.<source_identifier>@<smtp_host> by default.
If you specify only the sender domain, the format of the sender address is <LXCA_host_name>@<sender_domain> (for example, XClarity1@company.com).
If you set up your SMTP server to require a hostname to forward emails, and you do not set up a hostname for XClarity Administrator, it is possible that the SMTP server might reject forwarded events. If XClarity Administrator does not have a hostname, the event is forwarded with the IP address. If the IP address cannot be obtained, localhost
is sent instead, which might cause the SMTP server to reject the event.
If you specify the sender domain, the source does not identify in the sender address. Instead, information about the source of the event is included in the body of the email, including system name, IP address, type/model, and serial number.
If the SMTP server accepts only emails that were sent by a registered user, the default sender address (LXCA.<source_identifier>@<smtp_host>) is rejected. In this case, you must specify at least a domain name in the From address field.
Optional: To establish a secure connection to the SMTP server, select the following connection types:
If one of these connection types is selected, LXCA attempts to download and import the SMTP server’s certificate to its truststore. You are asked to accept adding this certificate to the truststore.
Optional: If authentication is required, select one of the following authentication types:
Regular. Authenticates to the specified SMTP server using the specified user ID and password.
NTLM. Uses the NT LAN Manager (NTLM) protocol to authentication to the specified SMTP server using the specified user ID, password, and domain name.
OAUTH2. Uses the Simple Authentication and Security Layer (SASL) protocol to authenticate to the specified SMTP server using the specified user name and security token. Typically, the user name is your email address.
The security token expires after a short time. It is your responsibility to refresh the security token.
None. No authentication is used.
- Click Output Format to choose the output format of the event data to be forwarded in the email body and the format of the email subject. The information varies for each type of event forwarder.
The following example output format is the default format for email recipients. All words between double square brackets are the variables that are replaced with actual values when an event is forwarded. The available variables for the email recipients are listed in the Output Format dialog.
- Email subject
[[DeviceName]]-[[EventMessage]]
- Email body
Alert: [[EventDate]] [[EventMessage]]\n
\n
Hardware Information:\n
Managed Endpoint    : [[DeviceHardwareType]] at [[DeviceIPAddress]]\n
Device name         : [[DeviceName]]\n
Product name        : [[DeviceProductName]]\n
Host name           : [[DeviceHostName]]\n
Machine Type        : [[DeviceMachineType]]\n
Machine Model       : [[DeviceMachineModel]]\n
Serial Number       : [[DeviceSerialNumber]]\n
DeviceHealthStatus  : [[DeviceHealthStatus]]\n
IPv4 addresses      : [[DeviceIPV4Addresses]]\n
IPv6 addresses      : [[DeviceIPV6Addresses]]\n
Chassis             : [[DeviceChassisName]]\n
DeviceBays          : [[DeviceBays]]\n
\n
LXCA is: [[ManagementServerIP]]\n
\n
Event Information:\n
  Event ID        : [[EventID]]\n
  Common Event ID : [[CommonEventID]]\n
  EventSeverity   : [[EventSeverity]]\n
  Event Class     : [[EventClass]]\n
  Sequence ID     : [[EventSequenceID]]\n
  Event Source ID : [[EventSourceUUID]]\n
  Component ID    : [[EventComponentUUID]]\n
  Serial Num      : [[EventSerialNumber]]\n
  MTM             : [[EventMachineTypeModel]]\n
  EventService    : [[EventService]]\n
  Console link    : [[ConsoleLink]]\n
  iOS link        : [[iOSLink]]\n
  Android link    : [[AndroidLink]]\n
  System Name     : [[DeviceFullPathName]]\n
You can click Reset to defaults to change the output format back to the default fields.
- Click the Allow Excluded Events toggle to either allow or prevent excluded event from being forwarded.
- Select Enable this forwarder to activate event forwarding for this event forwarder.
- Click Next to display the Devices tab.
- Select the devices and groups that you want to monitor for this event forwarder.
To forward events for all managed devices (current and future), select the
Match all systems checkbox.If you do not select the Match all systems checkbox, ensure that the selected devices do not have a DUMMY-UUID in the UUID column. A Dummy-UUID is assigned to devices that have not yet recovered after a restart or are not discovered completely by the management server. If you select a device with a Dummy-UUID, event forwarding works for this device until the moment when the device is fully discovered or recovered and the Dummy-UUID changes to its real UUID.
- Click Next to display the Events tab.
- Select the filters to use for this event forwarder.
Match by event category.
To forward all audit events regardless of the status level, select Include All Audit events.
To forward all warranty events, select Include Warranty events.
To forward all health-status-change events, select Include Status Change events.
To forward all health-status-update events, select Include Status Update events.
Select the event classes and serviceability level that you want to forward.
Enter IDs for one or more events that you want to exclude from forwarding. Separate IDs by using a comma (for example, FQXHMEM0214I,FQXHMEM0214I).
Match by event code. Enter IDs for one or more events that you want to forward. Separate multiple IDs by using a comma.
Exclude by event category.
To exclude all audit events regardless of the status level, select Exclude All Audit events.
To exclude all warranty events, select Exclude Warranty events.
To exclude all health-status-change events, select Exclude Status Change events.
To exclude all health-status-update events, select Exclude Status Update events.
Select the event classes and serviceability level that you want to exclude.
Enter IDs for one or more events that you want to forward. Separate IDs by using a comma.
Exclude by event code. Enter IDs for one or more events that you want to exclude. Separate multiple IDs by using a comma.
- Choose whether to include certain types of events.
Include All Audit events. Sends notifications about audit events, based on the selected event classes and severities.
Include Warranty events. Send notifications about warranties.
Include Status Change events. Sends notifications about changes in status.
Include Status Update events. Sent notifications about new alerts.
Include Bulletin events. Sends notification about new bulletins.
- Select the types of events and severities for which you want to be notified.
- Select whether to filter events by serviceability.
- Click Next to display the Scheduler tab.
- Optional: Define the times and days when you want the specified events to be forwarded to this event forwarder. Only events that occur during the specified time slot are forwarded.
If you do not create a schedule for the event forwarder, events are forwarded 24x7.
Use the Scroll left icon ( ) and Scroll right icon (
 ), and Day, Week, and Month buttons to find the day and time that you want to start the schedule.
Double-click the time slot to open the New Time Period dialog.
Fill in the required information, including the date, start and end times, and whether the schedule is to be reoccurring.
Click Create to save the schedule and close the dialog. The new schedule is added to the calendar.
You can change the time slot by dragging the schedule entry to another time slot in the calendar.
You can change the duration by selecting the top or bottom of the schedule entry and dragging it to the new time in the calendar.
You can change the end time by selecting the bottom of the schedule entry and dragging it to the new time in the calendar.
You can change a schedule by double-clicking the schedule entry in the calendar and clicking Edit Entry.
You can view a summary of all schedule entries by selecting Show Scheduler Summary. The summary includes the time slot for each entry and which entries are repeatable.
You can delete a schedule entry from the calendar or scheduler summary by selecting the entry and clicking Delete Entry.
- Click Create.
The event forwarder is listed in the Event Forwarding table.
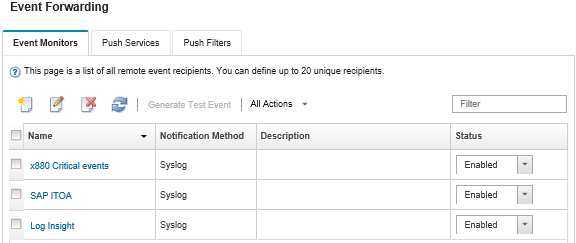
- Select the new event forwarder, click Generate Test Event, and then verify that the events are forwarded correctly to the appropriate email service.
After you finish
From the Event Forwarding page, you can perform the following actions on a selected event forwarder.
Refresh the list of event forwarders by clicking the Refresh icon ( ).
).
View details about a specific event forwarder by clicking the link in the Name column.
Change the event-forwarder properties and filter criteria by clicking the event-forwarder name in the Name column.
Delete the event forwarder by clicking the Delete icon ( ).
).
Suspend event forwarding (see Suspending event forwarding).