Managing disk space
You can manage the amount of disk space that is used by Lenovo XClarity Administrator by moving large data files that are not immediately needed to a remote share or by deleting resources that are no longer needed.
About this task
To determine how much disk space is currently being used, click Dashboard from the XClarity Administrator menu bar. The disk space usage on the repository and remote shares is listed in the XClarity Administrator Activity section.
Procedure
Complete one or more of the following steps to free up disk space by moving files to a remote share and deleting unneeded resources.
Delete unneeded resources
You can quickly delete files from the local repository that are no longer needed by completing the following steps.
From the XClarity Administrator menu bar, click to display the Disk Cleanup page.
Select the files that you want to delete. The section header identifies the amount of space that will be freed when the files are deleted.
Operating system related files
You can delete OS Images, boot-option files, and software files.
Firmware updates
You can delete payload files for all OS device drivers that are associated with UpdateXpress System Packs (UXSPs) and individual device drivers that are in the Downloaded state.
You can delete payload files for individual firmware updates that are in the Downloaded state and are not used in a firmware-compliance policy.
You can delete payload files for management-server updates that are in the Downloaded state.
NoteWhen the firmware-updates repository is located on a remote share, you cannot use the disk-cleanup function to delete individual firmware updates and UXSPs.Service data files
When service event occurs on a device, service data is collected automatically for that device. Service data is automatically captured for the management server every time an exception occurs in the XClarity Administrator. It is recommended that you periodically delete these archives if XClarity Administrator and the managed devices are running without issues.
When management-server updates are successfully applied, the update files are automatically removed from the repository.
Click Delete Selected.
Review the list of files that you selected, and click Delete.
Move firmware update packages to a remote repository
By default, Lenovo XClarity Administrator uses a local (internal) repository for storing firmware updates. You can free up disk space that is available to the XClarity Administrator local repository by using a mounted remote share over SSH File System (SSHFS) as a remote repository. You can then use firmware update files directly from the remote repository to maintain firmware compliance on your devices. For more information, see Using a remote repository for firmware updates.
When you change the location of the firmware updates repository, you can choose to copy all firmware update from the original repository to the new repository.
Firmware update files in the original repository are not automatically cleaned up after switching locations.
TipThe remote updates repository can be shared by multipleXClarity Administrator management servers. To move firmware updates to a remote firmware-updates repository, complete the following steps.
Add a remote share to XClarity Administrator (see Managing remote shares).
From the XClarity Administrator menu bar, click . The Firmware Updates Repository page is displayed.
Click to display the Switch Repository Location dialog.
Select the remote share that you just created from the Repository Location drop down list.
Select Copy update packages from current repository the new repository to copy firmware update files to the new repository location before switching the repository location.
Click OK.
A job is created to copy firmware update packages to the new repository. You can monitor the job progress by clicking from the XClarity Administrator menu bar.
Clean up firmware update files in the local repository.
Switch the location to the local repository by clicking , select the Local Repository for the repository location, and then click OK.
Click the Individual Updates tab, click the select-all checkbox in the table to select all firmware updates, and then click the Delete full update packages icon (
 )
)Click the UpdateXpress System Pack (UXSP) tab, click the select-all checkbox in the table to select all UXSPs, and then click the Delete UXSP and associated policy icon (
 )
)Switch the location back to the remote repository by clicking , selecting the new remote repository for the repository location, and then clicking OK.
Move XClarity Administrator backups to a remote share
You can free up disk space that is available to the XClarity Administrator local repository by moving XClarity Administrator backups to a remote share. However, you cannot use the files directly on the remote share. To use the files, you must move them back to the XClarity Administrator local repository. For more information about remote shares, see Managing remote shares.
ImportantIt is recommended that you download backups to your local system or copy backups to a remote share before deleting the backups inXClarity Administrator. From the XClarity Administrator menu bar, click to display the Back Up and Restore Data page.
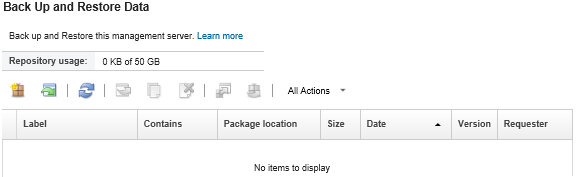
The Package location column identifies whether the backup is stored, either locally in the XClarity Administrator local repository or on a remote share.
Select the backup, and click the Copy Backup icon (
 ) to displays the Copy Backup dialog.
Choose the remote share to store the backup.
Click Copy.
Monitor the copy progress on the Jobs page. When the copy is complete, select the backup again, and click the Delete Backup icon (
 ) to display the Delete Backup dialog.
Select
Local
for the location.Click Delete.