
Configuring a remote file server

You can import OS images, device drivers, and boot files into the OS images repository from the local system or from a remote file server. To import files from a remote file server, you must first create a profile that is used to authenticate the connection to the remote file server.

About this task

The following cryptographic algorithms are supported:

  • RSA–2048 bits

  • RSA–4096 bits

  • ECDSA–521 bits (secp521r1 curve)

The following protocols are supported:

  • HTTP with no authentication.

  • HTTP with basic authentication.

  • HTTPS (certificate validation) with basic authentication.

  • HTTPS (certificate validation) with no authentication.

  • FTP with password authentication.

  • SFTP (client validation) with password authentication.

  • SFTP (client validation) with public-key authentication

For SFTP public key authentication and HTTPS certificate validation, Lenovo XClarity Administrator validates that the remote file server’ certificate. If the server certificate is not in the trust store, you are prompted to accept the server certificate and add it to the trust store. For information about troubleshooting validation issues, see Server certification validation fails.

Procedure

To configure a remote file server, complete the following steps.

  1. From the XClarity Administrator menu bar, click Provisioning > Manage OS images to display the Deploy Operating System: Manage OS images page.
  2. Click the Configure File Server icon (Configure remote file server icon) to display the Configure Remote File Server dialog.
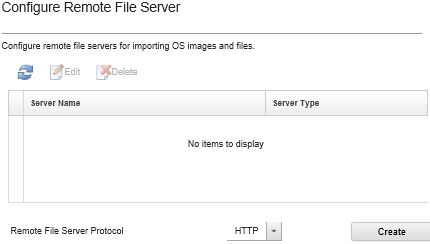
    Illustrates the Import Device-Driver Image dialog for importing or deleting device-driver images.
  3. Select the protocol for the remote file server from the Remote File Server Protocol list.
  4. Click Create. The Configure Remote File Server dialog is displayed.
    Note
    This dialog differs depending on the protocol that you selected.
  5. Enter the server name, address, and port.
  6. For HTTP, HTTPS, FTP, and SFTP with basic authentication, enter a user name and password if authentication is required to access the server.
  7. For SFTP with basic authentication, click Validate Server Certificate to obtain the public key signature.
    Note
    A dialog might be displayed informing you that the OS deployment process does not trust the public key of the SFTP file server. Click OK to store and trust the SFTP public key in the OS deployment trusted key store. If successful, the public key signature is shown in the SFTP Server Public Key Signature field.
  8. For SFTP with public-key authentication:
    1. Enter a key passphrase and password and select the key type if authentication is required to access the server.
    2. Click Generate Management Server Key to obtain the public-key signature.
    3. Copy the generated key to the authorized_keys file in your SFTP remote file server.
    4. Select the The Management key was copied onto the server checkbox in XClarity Administrator.
    5. Click Validate Server Certificate to validate the public key signature.
      Note
      A dialog might be displayed informing you that the OS deployment process does not trust the public key of the SFTP file server. Click OK to store and trust the SFTP public key in the OS deployment trusted key store. If successful, the public key signature is shown in the SFTP Server Public Key Signature field.
    6. Click Save.
  9. Click Save Server.

After you finish

From the Configure Remote File Server dialog, you can perform the following actions:

  • Refresh the list of remote file server by clicking the Refresh icon (Refresh icon).

  • Modify a selected remote file-server by clicking the Edit icon (Edit icon).

  • Remove a selected remote file server by clicking the Delete icon (Delete icon).