Deploying VMware ESXi v6.7 with Lenovo Customization to a local disk using a static IP address
This scenario installs the VMware ESXi v6.7 with Lenovo Customization operating system to the local disk using the static IP address of the host server. A custom OS-image profile is used that includes an unattend file with predefined macros. This custom profile can be selected on the Deploy OS Images page. Known values are substituted for the predefined macros in the custom unattend file, and the VMware ESXi kickstart installer uses those values in the unattend file to configure the operating system.
Before you begin
This scenario uses the following sample files.
ESXi_staticIP_customUnattend.cfg. This custom unattend file uses values in predefined macros.
Procedure
To deploy VMware ESXi v6.7 using custom OS-image profile, complete the following steps.
- Download the VMware vSphere® Hypervisor (ESXi) with Lenovo Customization operating system from the VMware Support – Downloads webpage website to the local system, and import the image to the OS-images repository. For more information, see Importing operating-system images.
From the XClarity Administrator menu bar, click to display the Deploy Operating System: Manage OS Images page.
Click the OS Images tab.
Click Import icon (
 ).
).Click Local Import.
Click Browse to find and select the ESXi image to import (for example, ESXi6.7-7535516-RC-Lenovo_20180126_Async.iso).
Click Import to upload the image to the OS-images repository.
Wait for the import to complete.
- Modify the ESXi unattend (kickstart) file to add the required predefined macros and other predefined macros where applicable, such as the IP address, gateway, DNS and host name settings, and then import the custom file to the OS-images repository. For more information, see Importing custom unattend files.
For ESXi and RHEL only, XClarity Administrator provides the #predefined.unattendSettings.networkConfig# macro, which adds all network settings that are defined in the UI to the unattend file. Because this example specifies a setting (--addvmportgroup) that is not defined in the UI, the .#predefinedunattendSettings.storageConfig# macro is not used in the sample unattend file. Instead, network settings are individually added to the file, and the #predefined.hostPlatforms.networkSettings.<setting># macros are used.
For ESXi and RHEL only, XClarity Administrator also provides the #predefined.unattendSettings.storageConfig# macro, which adds all storage settings that are defined in the UI to the unattend file. Because this example specifies settings (--novmfsondisk and –ignoressd) that are not defined in the UI, the #predefinedunattendSettings.storageConfig# macro is not used in the sample unattend file. Instead, storage settings are individually added and --firstdisk=local is hardcoded in the file.
NoteXClarity Administrator provides some basic convenience macros, such as OOB driver injection, status reporting, post-install scripts, custom software. However, to take advantage of these predefine macros, you must specify the following macros in the custom unattend file. The example file already contains the required macros. Note that because the %firstboot section is included, the ordering of these predefined macros matters. For more information, seeImporting custom unattend files. #predefined.unattendSettings.preinstallConfig#
#predefined.unattendSettings.postinstallConfig#The example file already contains the required macros and additional predefined macros for dynamically specifying network settings for the target server. For more information about adding macros to unattend files, see Injecting predefined and custom macros to an unattend file.
For more information about available predefined macros, see Predefined macros.
To import the custom unattend file, complete these steps.
Click the Unattend Files tab.
Click the Import icon (
).Click Local Import.
Select ESXi for the operating system.
Click Browse to find and select the unattend file to import (for example, ESXi_staticIP_customUnattend.cfg).
Click Import to upload the file to the OS-images repository
- Create a custom OS-image profile that includes the custom unattend. For more information, see Creating a custom OS-image profile.
Click the OS Images tab.
Select an OS-image profile to customize (for example, Virtualization).
Click Create icon (
 ) to display the Create Customized Profile dialog.
On the General tab:
Enter a name for the profile (for example, Custom ESXi using static IP).
Use the default value for the Custom data and file path field.
Select Only unattend files for the customization type.
Click Next.
On the Unattend Files tab, select the unattend file (for example, ESXi_staticIP_customUnattend.cfg), and click Next.
On the Summary tab, review the settings.
Click Customize to create the custom OS-image profile.
- Deploy the custom OS-image profile to the target server. For more information, see Deploying an operating-system image.
From the XClarity Administrator menu bar, click to display the Deploy Operating System: Deploy OS Images page.
For each target server:
Select the server.
Click , and specify the hostname, IP address, DNS, MTU and VLAN settings for the server.
TipVLAN settings are available only when VLAN mode is set in .
The network settings that you specify on the Network Settings dialog are added to the unattend file at runtime using the #predefined.hostPlatforms.networkSettings.<setting># macros.
Select the custom OS-image profile (for example, <base_OS>|<timestamp>_Custom ESXi using static IP) from the drop-down list in the Image to Deploy column
NoteEnsure that all target servers use the same custom profile.(Optional) Click the License Key icon (
 ) and specify the license key to use to activate the operating system after it is installed.
Verify that the deployment status for the selected server is Ready.
NoteBecause--firstdisk=local is specified in the unattend file, you do not need to specify the preferred storage location in the Storage column. The setting in the UI is ignored. Select all target servers, and click the Deploy image icon (
 ) to initiate the operating-system deployment.
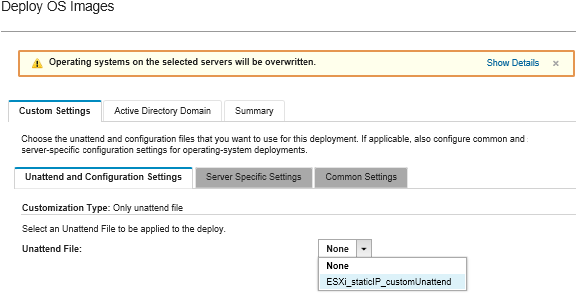
On the Custom Settings tab, click the Unattend and Configuration Settings subtab, and select the custom unattend file (for example, ESXi_staticIP_customUnattend.cfg).
On the Summary tab, review the settings.
Click Deploy to deploy the operating system.