Removing a rack
You can remove a rack from Lenovo XClarity Administrator.
Procedure
Complete the following steps to remove a rack.
- From the XClarity Administrator menu bar, click . The All Racks page is displayed.
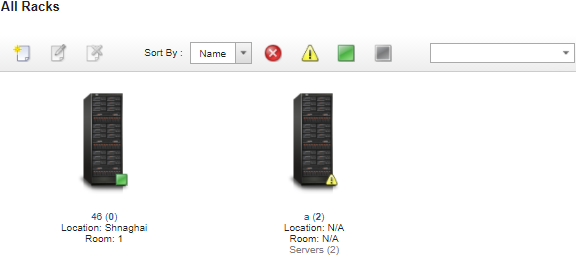
The All Racks page shows each rack as a thumbnail image with the name of the rack, the number of managed devices that are in the rack, and the status of the device with the highest severity.
NoteYou can sort the list by rack name, number of devices in the rack, or by severity to make it easier to find specific racks. Sorting is ordered from left to right, top to bottom. In addition, you can filter the racks by severity by clicking on the following icons in the toolbar or enter a rack name in theFilter field to further filter the racks that are displayed. - Critical alerts icon (
 )
) - Warning alerts icon (
 )
) - Normal alerts icon (
 )
)
- Critical alerts icon (
- Click the Remove icon (
 ).
).
Results
The thumbnail for the rack is removed from the All Racks page, and all devices that were in the rack are now available for inclusion in other rack on the Edit Racks page.
Give feedback