
Defining Fibre Channel boot-target settings

You can configure the server to boot from a storage area network (SAN) device instead of from local disk drive by creating a Fibre Channel boot-target pattern.

Procedure

Complete the following steps to create a Fibre Channel boot-target pattern.

Restriction: Fibre Channel boot targets are supported for only Flex compute nodes. Standalone rack and tower servers are not supported.

  1. From the Lenovo XClarity Administrator menu bar, click Provisioning > Patterns. The Configuration Patterns: Patterns page is displayed.
  2. Click the Category Patterns tab.
  3. Click the Fibre Channel Boot Target Pattern vertical tab, and then click the Create icon (Create icon).
  4. In the New Fibre Channel Boot Target Pattern dialog, specify the following information.
    • Enter a name and description for the pattern.
    • Specify one or more WWPN addresses and LUN identifiers to use as primary boot targets. In addition, you can optionally specify one or more WWPN addresses and LUN identifiers to use as secondary boot targets.

      For example, you can add the storage primary paths as primary targets, and the storage secondary paths as secondary targets. By using different target groups in different server patterns, you can balance the storage load during simultaneous boot requests from multiple hosts.

      Tip
      If you specify 00:00:00:00:00:00:00:00 for the WWPN, XClarity Administrator attempts to boot from the first discovered target.
  5. Click Create.

Results

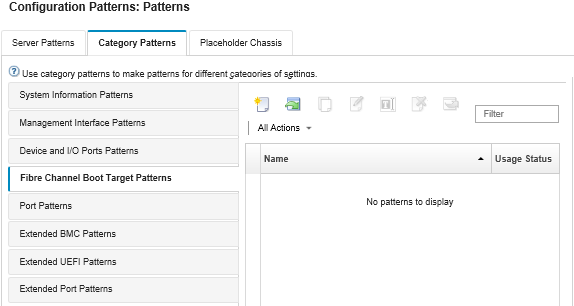
The new pattern is listed on the Fibre Channel Boot Target Patterns tab in the Configuration Patterns: Category Patterns page:


Illustrates the list of customized Fibre Channel boot target patterns on the Configuration Patterns: Category Patterns page.
From this page, you can also perform the following actions on a selected category pattern:
  • Modifying current pattern settings by clicking the Edit icon (Edit icon).
  • Copy an existing pattern by clicking the Copy icon (Edit icon).
  • Delete a pattern by clicking the Delete icon (Delete icon).
  • Rename a pattern by clicking the Rename icon (Rename icon).
  • Import or export patterns (see Exporting and importing server and category patterns).