Viewing warranty information
You can determine the warranty status (including extended warranties) of the managed devices.
Before you begin
Lenovo XClarity Administrator must have access to the following URLs to collect warranty information for the managed devices. Ensure that there are no firewalls blocking access to these URLs. For more information, see Firewalls and proxy servers.
Lenovo Warranty Database (world-wide) – https://ibase.lenovo.com/POIRequest.aspx
Lenovo Warranty Database (China only) – http://service.lenovo.com.cn:83/webservice/NewProductQueryService.asmx
Lenovo Warranty Web Service – http://supportapi.lenovo.com/warranty/ or https://supportapi.lenovo.com/warranty/
You can enable or disable these warranty URLs in XClarity Administrator by clicking .
Note
For RackSwitch devise, the Serial Number column shows the entitled serial number.
Procedure
To view the warranty status of managed devices, complete the following steps.
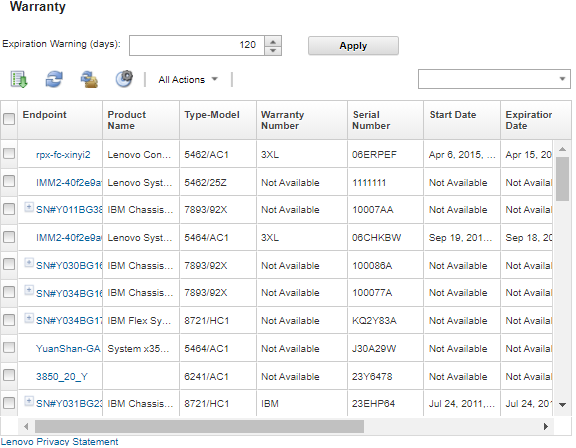
- Click Warranty in the left navigation to display the Warranty page.
This page contains a table that lists warranty information (such as start date, stop date, and status) for each managed device.
After you finish
From the Warranty page, you can perform the following actions:- Set the when you want to be warned about the warranty expiration for a managed device using the Expiration Warning field. The default is 30 days before the warrant expires.
- Look up warranty information (if available) for a specific device on the Lenovo Support website by clicking the link in the Status column.
- Export warranty status for all managed devices to a CSV file by clicking the Download CSV icon (
 ).
). - Refresh warranty information for all managed devices by clicking the Refresh Server List icon (
 ).
).
Give feedback