Creating and assigning update-compliance policies
You can create an update-compliance policy based on the acquired updates in the updates repository. You can then assign the policy to one or more XClarity Administrator resource managers or managed servers.
Before you begin
When you create an update-compliance policy, you select the target update version to be applied to the resources that will be assigned to the policy. Ensure that update files for the target version are in the updates repository before you create the policy.
When you download or import a firmware-update repository pack, the predefined firmware-compliance policies in the repository pack are added to the updates repository. This is considered a predefined policy, which cannot be modified or deleted.
About this task
Update-compliance policies ensure that the software or firmware on certain managed resources are at the current or specific level by flagging the resources that need attention. Each update-compliance policy identifies which resources are monitored and which software or firmware level must be installed to keep the resources in compliance. XClarity Orchestrator then uses these policies to check the status of managed resources and to identify resources that are out of compliance.
When you create an update-compliance policy, you can choose to have XClarity Orchestrator flag a resource when the software or firmware on the resource is down level.
After an update-compliance policy is assigned to a resource, XClarity Orchestrator checks the compliance status of the resource when the updates repository changes. If the software or firmware on the resource is not compliant with the assigned policy, XClarity Orchestrator flags that resource as not compliant on the Apply / Activate page, based on the rules that you specified in the update-compliance policy.
For example, you can create an update-compliance policy that defines the baseline software level for XClarity Administrator, and then assign that policy to all XClarity Administrator resource managers. When the updates catalog is refreshed and when a new update is downloaded or imported, the XClarity Administrator instances might become out of compliance. When that happens, XClarity Orchestrator updates the Apply / Activate page to show which XClarity Administrator instances are not compliant and generates an alert.
Procedure
To create and assign an update-compliance policy, complete the following steps.
- Create an update-compliance policy.
- From the XClarity Orchestrator menu bar, click Provisioning (
 ) > Updates and then click Policy Management to display the Policy Management card.
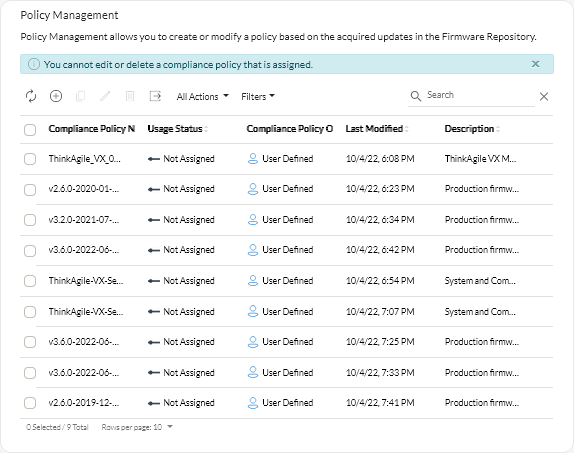
- Click the Create icon (
 ) to display the Create compliance policy dialog.
 - Specify the name and optional description for the policy.
- Specify the trigger for the policy. This can be one of the following values.
- Flag if not exact match. If the software or firmware version that is installed on resource is earlier or later than the target firmware version in the update-compliance policy, the resource is flagged as not compliant. For example, if you replace a network adapter in a server, and the firmware on that network adapter is different than the target firmware version in the assigned update-compliance policy, the sever is flagged as Not Compliant.
- Do not flag. Resources that are out of compliance are not flagged.
- Click the Rules tab to add compliance rules for this policy.
- Select the type of resource for this policy.
- Specify the compliance target for the applicable resource and components.For resources with components, you can choose one of the following values.
- Custom. The compliance target for each resource component defaults to the current latest version in the repository for that component.
- Do not update. The compliance target for each resource component defaults to Do not update. Note that if you change the default value for any component, the compliance target for the overall resource changes to Custom.For resources without components and for each component, you can choose one of the following values.
- {firmware_level}. Specifies that the firmware on the component must be at the selected baseline firmware version.
- Do not update. Specifies that the firmware on the component is not to be updated. Note that firmware on the backup (secondary) management controller is not updated by default.
- Click the Add icon () to add additional rules, and click the Delete icon (
 ) to delete rules.
- Click Create.
- From the XClarity Orchestrator menu bar, click Provisioning (
- From the XClarity Orchestrator menu bar, click Provisioning () > Updates and then click Apply and Activate to display the Apply and Activate card.
- Assign the update-compliance policy to resources.
- To a single resource
For each resource, select a policy from the Assigned Compliance Policy column drop-down list.
You can select from a list of compliance policies that are applicable to the resource. If a policy is not currently assigned to the resource, the assigned policy is set to No Assignment. If no policies are applicable to the resource, the assigned policy is set to No applicable policies.
- To multiple resources
- Select one or more resources to which you want to assign the policy.
- Click the Assign icon (
 ) to display the Assign Policy dialog.
 - Select the policy that you want assign.
You can select from a list of compliance policies that are applicable to all selected resources. If a policy is not currently assigned to the resource, the assigned policy is set to No Assignment. If no policies are applicable to the resource, the assigned policy is set to No applicable policies. If resources were not selected before opening the dialog, all policies are listed.
NoteSelectNo Assignment to remove the policy assignment from the selected resource. - Select one of the following scopes for the policy assignment.
- All applicable devices that are…
- Only selected applicable devices that are …
- Select one or more policy criteria.
- Without an assigned policy
- Non-compliant (overwrite current assigned policy)
- Compliant (overwrite current assigned policy)
- Click Apply.
The policy that is listed in the Assigned Policy column on the Firmware Updates: Repository page changes to the name of the selected firmware-compliance policy.
- To groups of resources
- Click the Assign icon () to display the Assign Policy dialog.
- Select the policy that you want assign.
You can select from a list of compliance policies that are applicable to all resources in the group. If a policy is not currently assigned to the resource, the assigned policy is set to No Assignment. If no policies are applicable to the resource, the assigned policy is set to No applicable policies.
NoteSelectNo Assignment to remove the policy assignment from the resources in the group. - Select one or more groups of resources to which you want to assign the policy.
- Select one of the following scopes for the policy assignment.
- All applicable devices that are…
- Only selected applicable devices that are …
- Select one or more policy criteria.
- Without an assigned policy
- Non-compliant (overwrite current assigned policy)
- Compliant (overwrite current assigned policy)
- Click Apply.
The policy that is listed in the Assigned Policy column on the Firmware Updates: Repository page changes to the name of the selected firmware-compliance policy.
- Click the Assign icon (
- To a single resource
After you finish
You can perform the following actions from the Policy Management card.
- View policy details by clicking on the row in the table.
- Modify a selected policy by clicking the Edit icon (
 ).NoteYou cannot modify a policy that is assigned to one or more resources. You must first unassign the policy.
 - Copy and modify a selected policy by clicking the Copy icon (
 ).
). - Delete a selected user-defined policy by clicking the Delete icon (
 ).NoteYou cannot delete a policy that is assigned to one or more resources. You must first unassign the policy.
From the Apply and Activate card, you can unassign a policy for a selected resource by clicking the Assign icon (![]() ), selecting No Assignment policy, and then selecting whether to apply the change to all resources with a policy assignment or to only the selected resources.
), selecting No Assignment policy, and then selecting whether to apply the change to all resources with a policy assignment or to only the selected resources.